
DIY Pleather Drawstring Shorts
Pleather shorts are a necessity to any closet. Everyone needs at least that one piece of edginess, and pleather shorts can deliver that!
You will need:
1) Pleather fabric
2) Elastic
3) Needles
4) Scissors
5) Pencil or crayon to make marks
Difficulty: Intermediate
Time: About 1 hour


Here are the pattern pieces I used. Above, I altered a regular shorts pattern that I made.The pieces will cross over each other when you sew it altogether, which is why I labeled "top" and "bottom". Cut out four pieces from the pattern. You can find the shorts pattern I used here: http://atlofysabel.blogspot.com/2014/04/diy-high-waist-shorts.html

Sew along the "J's", the pleather sides facing each other.


Bring the two ends of the "J's" over together and sew.

Here's how it should come out. You can have the overlapping fabric on the front of your shorts or the back.

Take elastic and measure around your waist or hips; wherever you want your shorts to sit. I didn't have enough elastic to go around, so I took two pieces and sewed it together.


On your shorts, fold it over once or twice. This will be the waistband you will be feeding your elastic into.


Use the safety pin method by putting a safety pin on one end of the elastic, and using that to push it through the waistband.

Once you're done, be sure to sew the elastic ends together!

Here's how it looks with the elastic in. You're almost done!

Lastly is the drawstring part. With any remaining fabric or string of your choice, thread it through the waistband using the safety pin method.
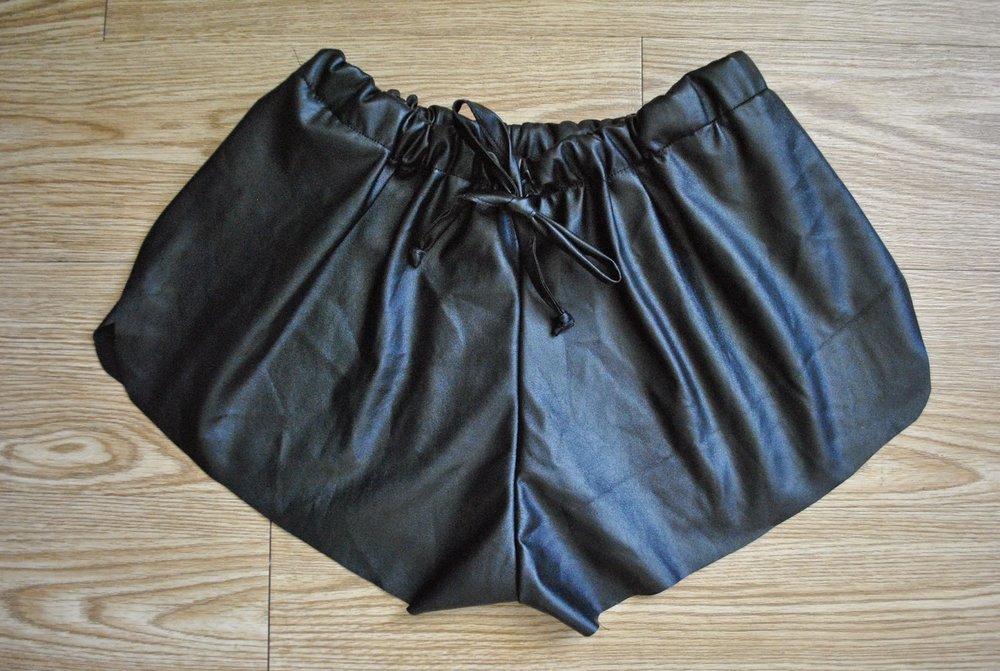
The final result!

As you can see, I didn't finish the ends because pleather doesn't fray. However if you'd like a cleaner look, go ahead and fold over the ends once or twice.

Here's how the overlapping fabric looks on the side. You can sew along the edge as well for it to be more stable.

Happy sewing!
xoxo, Ysabel